http://live.visitmix.com/resources for all the code, samples, and more.
Yo-yo champion to entertain us while we wait…

They’re showing PhotoSynth being overlaid on maps. Also, overlaying geotagged images on maps in Bing. Very cool. Photos are taken from Flickr (and others?) and create what looks like synths. www.discoverbingmaps.com

Scott Guthrie (Corporate Vice President, Developer Division, Microsoft) is here. Biggest MIX event ever.
Talking about Silverlight EVERYWHERE. In the Media, RIA, and on the phone.
Silverlight was installed on 45% of all devices as of PDC 2009. Almost 60% now.
The almost-instant videos of Olympic events were created with a “Silverlight Rough Cut” editor. Way cool. All the code is being open sourced! Download at http://smf.codeplex.com.
Silverlight 4 will have Output Protection and Offline DRM, as well as Webcam, Microsoft, and Multicast Streaming. However, I’m wondering what kind of issues this will represent…

Slide of Silverlight 4 new features. Trusted apps that can reach outside sandbox. Hmm… Right-click is a “new feature” – good thing Christian pointed that out – funny 🙂 Private Mode Browsing? Neat-o… Great for porn sites.
WYSIWYG XAML design editor in Visual Studio 2010… that should be nice. I need to play with that.
Showing Expression Blend 4. “Great support for Silverlight 4.” Free Upgrade for Expression Web 4, so if you have Expression Web 3, you’ll get 4 for free!
eBay is using Silverlight. Inviting them on stage now to talk about it. Showing eBay Simple Lister Beta. Can take photos of images and add them to listings. Sounds like a great online tool for eBayers. You can drag a photo from the desktop right into the application. That’s pretty cool. This app will be announced/released at the Silverlight 4 launch. eBay opened the “Open eBay” applications marketplace in the past month, so applications can be marketed on eBay. http://appstore.ebay.com

I really need Buzzword Baby at this point… The Cynergy guy is presenting.
I think I just wet myself over Silverlight 4 and Expression Blend 4. The Sketch Flow is AMAZING. Very, very interactive.
Expression Web 4 RC is now available for download.
Final version of Expression Web is being released next month.
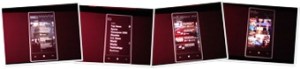
Joe Belfiore is coming now. Then Scott’s going to show how to develop.

Development platform being announced. Corporate VP, Windows Phone.
Assuring us this is a real phone.
Wide tiles are called “double wides”.
What’s the ProjectX showing up in Belfiore’s calendar?
I’ll Be Late feature. Press the button and it asks you if you want to email the folks know that you’ll be late.
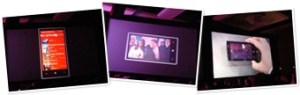
Idea of a hub is to create a central location that is task oriented. User can go there and find everything they care about relative to that data type. Sounds like Libraries in 7, but evolved. Hubs use a “panoramic experience,” which means the experience is wider than the screen.
Social networks must be aggregated via WINDOWS LIVE in order to be included in the feeds shown on the phone.
Whatever kind of music or video you like to use will appear in the hub… not sure what this means. Sounds like third-party apps will be allowed. Hey, maybe we’ll see iTunes for Windows Phone 7 Series! j/k 😉
Going to show apps written using XDA for the phone.
Showing AP Mobile app.
Now showing Hush Hush diary app from Jackson Fish Market.

Neat app, but obviously a very canned demo 🙂 Didn’t see the emoticon keyboard in the demo… maybe it was disabled. But that was strange.
Showing third party apps and how they can add value (i.e., link in) to the built-in apps.
Extras shows up in menus. Apps can identify themselves as “Photo Extension” and provide options. I’m imagining this is how the rest of the apps integrate. I like the floppy disk icon in the photo editing app extension.
Showing a 3D game called The Harvest. www.Lumaarcade.com appears to be the developer. Uses capacitive touch. This is an Xbox live game, so achievements can be earned.

Ok, he wrapped up. And now we’re back to Scott, who will explain how to build these apps.
Windows Phone 7: Silverlight + XNA
- Fully hardware accelerated
- This is Silverlight. No limitations. No compact framework bull***t anymore it seems 🙂
- Three templates built-in to VS2010 so far: Phone App, List App, Class Library.
- Designer is like VS2008, but XAML, but has the awesome designer stuff we WANT. That’s awesome. Double click and add code, just like you’d expect. This really changes the development game, since Apple and Android tools suck compared to Microsoft’s.
- An emulator is provided. It’s a “real phone”.
- Still don’t see emoticons in the keyboard anymore. What happened? Must be a setting?
- Finally, orientation support in the emulator.
- You can set the supported page orientations – that’s good 🙂
Scott’s about to show how to build a Twitter client
- Added a Silverlight listbox
- Not using the real Twitter, though, lol (api-twitter-com rather than api.twitter.com)
- Using LINQ-to-XML to parse the XML and bind them to the twitter items class and to the Listbox
- Ok, that was very cool – a Twitter client in less than 5 minutes
- If you’re running on a Windows 7 system with multi-touch, you can click and drag on images and get full multi-touch in the PC, and on the emulator! 🙂

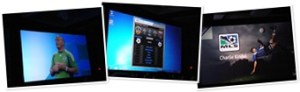
Inviting Jon Harris, Senior Product Manager@ Microsoft, on Designing Windows Phone Apps in Blend
Showing Expression Blend 4 for Windows Phone
Is that a separate product? Doesn’t appear to be, so maybe he misspoke.
Building an MVC app. Just dragging View Models into the app and adding it to the Data panel in Expression. He can create object data sources and work with them while designing. Drag them into the design surface and the app databinds and shows the data. Pretty cool.
You can import Adobe Photoshop and Adobe Illustrator documents inside of Expression Blend. I don’t know if this already existed, but that sure will help from the dev side – no more asking for JPEGs. I wonder how this affects the image size when deployed?
Can make any XAML page into a “control” … not sure what this means. Keynotes never have that level of detail, but will definitely try to learn more about this feature.
Supposedly Windows Phone 7 developer tools are now available, but I don’t see the tools online yet. Keep watching http://developer.windowsphone.com.
 Waiting for SDK…
All developer tools will be FREE FOR PHONE DEVELOPMENT. This is a very cool deal.
UPDATE: Tools will be available from MSDN or http://developer.windowsphone.com after 11AM Pacific.
Showing Netflix app. Scott Stanfield showing the app.
You can stream movies to the phone with the Netflix app, and it can change the bitrate on the fly (read Smooth Stream on phone!).
You’ll be able to resume movies, too! NICE!
Third party content integrates into the video area if asked.
Back to Scott…
Silverlight on Windows Phone 7 supports Deep Zoom. I wonder if they’ll add PhotoSynth to the phones? PhotoSynth + GeoTagging would be way sweet.
Showing Graphic.Ly app. View comic books on phone.

Many of these apps are showing list views. While that’s cool, how do the other types on non-game apps look?
Showing Deep Zoom on the comic books. Also showed thumbnail view. Pretty cool. But I’m not a comic book fiend, but the tech demo is pretty nice. Losing the audience a bit – wondering what they’re going to show that is just super amazing.
Note that there is zero mention about porting your existing apps.
Scott’s about to show Location and Map support. Users must give permission to use Location and Map – although he hasn’t provided information on this permission stuff. No demo of Marketplace yet.
Foursquare’s Laura Foy is about to chat about their Twitter app. Funny – her intro image shows a Macbook Pro.
I’d really like to see the install process and Marketplace.
Next up: Jeff Sandquist of Shazam
Windows Phone 7 apps can access the raw audio input from the mic.
(just thought about this… you’ll finally get a Windows Phone 7 Series at MIX… in the form of an emulator <grin>)
Looks like you can download music found in Shazam straight from Zune Marketplace.

Scott’s back, talking about Push Notification support.
Charlie Kindel will show Major League Soccer’s app.
Now for a demo of Marionette. Dressed up Steve Ballmer and tossed him around a bit. Funny.


Inviting Loic Le Meur from Seesmic on the stage.
Showing Seesmic Desktop running entirely on plug-ins.
Mobile version of the app is mostly the same code used for Seesmic Desktop.
Coding4Fun: Cannon
App to remotely control a cannon. Uses accelerometer to steer the cannon. Hahaha. Cool.

Shooting shirts into the audience. This thing has RANGE. Nice.
They will be open-sourcing the code to the cannon.
Now on to XNA
Free Visual Studio plug-in to enable the XNA stuff…
Larry Hryb is showing GooSplat and Battle Punks, written using XNA.
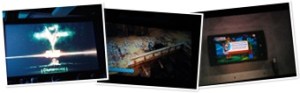
Showing how the same Harvest app will work on PC, Xbox 360, and Windows Phone.
Demos were created in about 3 weeks. (question: how many people? what are the details behind that data?)
On the Marketplace
There are both TRY and BUY buttons in Marketplace
He sort-of said you’ll be able to upload from Visual Studio or Expression to Marketplace. Not sure if that’s what he meant, but that sure would be cool. Kind of like Azure’s deployment model
You can download the Windows Phone Developer Tools… including Visual Studio 2010 for Windows Phone, Expression Blend 4 for Windows Phone, and XNA Studio for Windows Phone. These will be FREE FOREVER.
http://developer.windowsphone.com

It’s up!


