Having submitted an app with In-App purchases – specifically, subscriptions – to Apple’s store, our development team at M3 learned a lot about what will prevent a successful app submission. I hope this compiled list helps you get your app approved quickly, and prevent weeks of headaches.
I will update this article from time to time as more lessons are learned. I hope this article – and all the developer experience I’m relaying on behalf of others and myself – helps you!
An In-App Purchase Must Be Approved Before the App is Released
An In-App Purchase must be in the “Approved” state before it can be used in your app. This means Apple must test any new In-App Purchase Product or Subscription in your app release before anyone can purchase it, including you.
You Must Test In-App Purchases Work – Use the Sandbox Account
As explained above, it can seem like a “chicken and egg” problem. How do you test a product in production when it first must pass testing to get into production? This is where Sandbox accounts come into play. Under Users & Access in App Store Connect, you can assign Apple IDs that are allowed to purchase.
Note that these purchases don’t cost anything, but they can also expire. Make sure you stay on top of your sandbox purchases. Also, make sure you track the original purchase IDs coming back from the API. These will come in handy later when you need to restore subscriptions, which is anothe requirement.
Your App Must Provide a Mechanism to Restore the Subscription
It’s not enough to simply check Apple’s server to see if there is a valid subscription. You must offer an option in the UI (user interface) to explicitly restore.
It’s possible you will still be rejected for this reason. That can be due to Apple’s tester not being able to find the option. So, when you submit your testing instructions, make sure you point out where the option is. If they still say it isn’t there, politely reply to them with a screen shot proving you have such a feature.
You Must Show What the Expired Subscription Experience Looks Like
Make sure you provide an account, with credentials, that can be used to show off the app when a subscription has expired. Just include the credentials in the testing instructions. This should be a different account than the sample credentials you provide Apple for general testing.
Your App Must Clearly Explain What Benefits a Subscription Has vs. a Free Account
You must clearly describe what you get with a free account vs. a paid account. If there is no obvious benefit, Apple may reject you.
Your App Must Clearly Explain The Renewal Terms and Price
You must also be clear about your renewal terms, such as monthly, yearly, and so forth, and pricing. If it’s not clear, Apple can reject you.
It Must be Easy to Cancel Within Your App
It’s not enough that Apple lets you cancel from the App Store UI. You must also provide a button to allow cancelling your subscription.
When Verifying a Subscription Exists, Check BOTH Production AND Sandbox Environments
Apple may subscribe via Sandbox. So, if you only check Production when restoring accounts, you will fail to be approved because Apple won’t be able to restore their subscription. Always check Production first, then fall back to Sandbox.
Note Subscriptions Are Tied to Apple Accounts, Not Your Service’s Accounts
This was a big one. You can only have one subscription of each type per Apple account. However, your service may support multiple accounts. Make sure you track which account from your service subscribed, and tie that to the Apple original subscription ID. If you don’t, it’s possible you’ll be handing out “free” accounts to creating additional accounts under the same Apple ID.
You Can’t Generate Promo Codes Until the App is Approved
Unlike Google, Apple will only let you generate promo codes AFTER the app has been approved. Also, for subscriptions, Apple limits you to 100 promo codes with a 30 day expiration. Make sure you factor this into your testing and soft rollout plans.
Create Separate Test Accounts for Apple to Use
Don’t give Apple accounts your developers are using. Give them accounts that are in the exact state you need them to see. Developer accounts are too “in flux” to be reliable, and your own developers may interfere with Apple’s testing.
Be Thankful for (and take advantage of) Apple’s Feedback System
Apple likely has access to more testers than you do. There are aspects of In App Purchases you may not know how to test, or that you had to test in the first place. So, if you feel your app is in a submittable state and want to see if you covered everything, submit a build to Apple. They can give you a sanity check / smoke test you didn’t miss anything. If you pass the In App Purchases part of Apple’s testing, the rest may be smoother sailing 😉
Finally… my bourbon, whiskey, tequila, mezcal, wine, whatever you want to drink + taste + collect app… Liq… is now available for both mobile platforms. What an adventure!
Originally, Liq was a website – https://liq.live. It was the easiest place to start, and start figuring out what people want. Plus, any updates I push would be immediately available to everyone. No waiting on app updates, supporting older versions, writing an API and more advanced caching infrastructure… And no app store reviews to get through, which can be troublesome in some cases.
But my users have spoken! “We want an app!” So I got to work a couple months ago and started building. Thankfully, most of the code was reusable. I found out quickly, the mobile app was the way to go. I could guarantee the experience. I could code for phones vs. tablets. And I could make it insanely simple to have such a useful tasting + collection tool anywhere users went.
Once it was done and tested – thanks Club Marzipan! – I was ready to submit. I’ve done this countless times. Every time, you cross your fingers… Let the story begin.
The iOS Story
Usually, Apple App Review is the tough part. Who knows what unknown rule you might break when submitting your first app release. Once you’re past that, the untrusting eyes are mostly off you. But still… you have to get over that first hurdle.
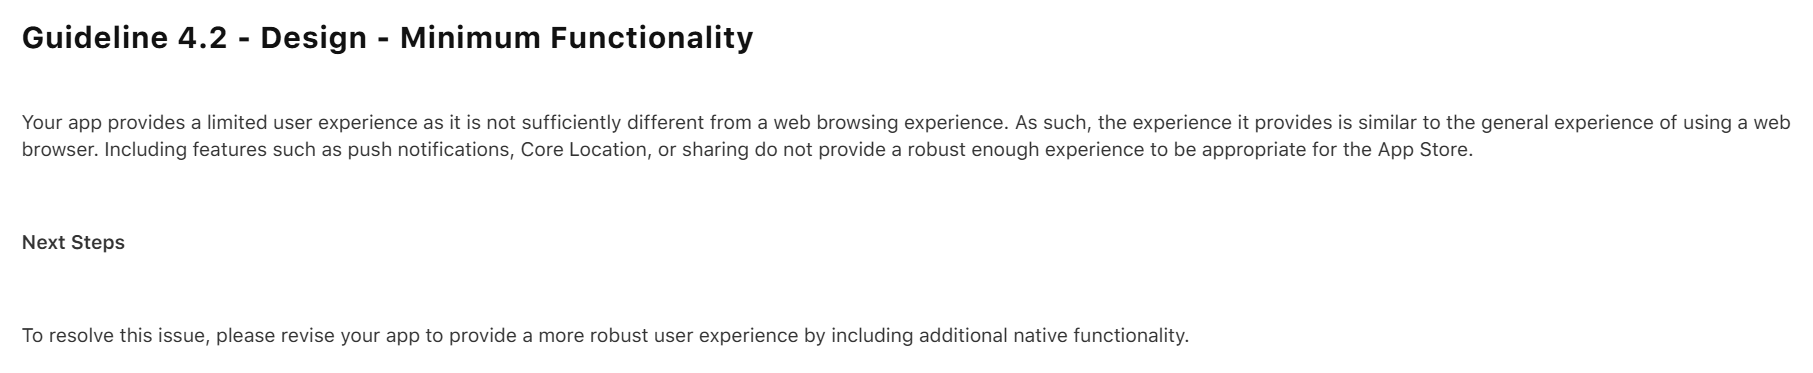
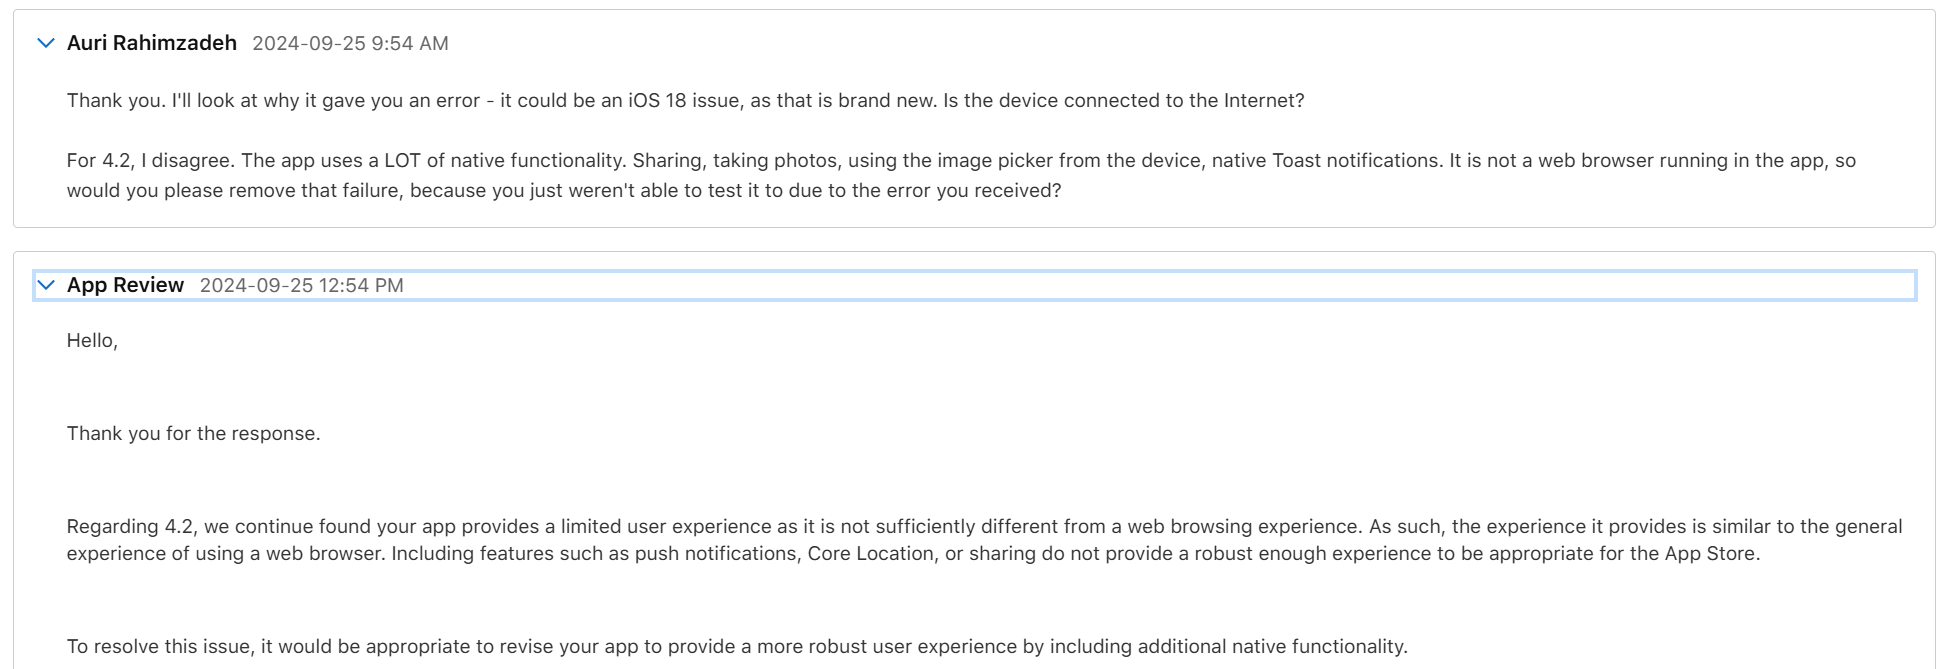
My initial submission was rejected. Apple found a bug I had never tested for, and they rightfully rejected the app. But not only did they reject it for the bug, they rejected it saying it’s nothing better than a website and I should add native features.
Well, that wasn’t fair, but I could see their point. Because of the bug, you couldn’t use the app. So, you wouldn’t see any of the features. I thanked them for reporting the bug, and that I disagreed about the “native” part. When working properly, Liq uses many native features. Native camera. Native photo access. Native sharing. Plus it’s, well, a native compiled app. Basically, every native feature Facebook uses except Location and Video, neither of which I need. Apple wrote back it doesn’t matter, but I ignored that – I told them “you’ll see in my next upload.”
I fixed the bug – again, thanks Apple, that was a good catch! – and re-uploaded. They came back about a day later with a new rejection reason. The bug was resolved, so that issue was removed, as was the “native” issue – phew! – that would have been an unnecessary rewrite. This time they pointed out I had no way to request account deletion. Fair point. I got to work.
I had the accout deletion fixed within a few hours. I tested the heck out of it. It worked great. I resubmitted and hoped for the best.
Two days later is was approved. w00t!
I did have some additional fixes. I let the original version get out there – it was only going to be out for a day – while I fixed some more bugs and tightened things up. Apple Reviews go much faster when you already a published verison of the app. I submitted the update and it was reviewed and approved the same day. Boom, proof.
Now, on to Android…
The Android Story
Usually, Google Play – the Android store – submission is a slam dunk. Google appears to use AI and another automated code-analysis system. I recall it being named something like The Bouncer. I don’t recall the exact name – it’s been a long time and I imagine things have changed. Anyway, given Apple’s issues were largely just Apple requirements, I figured I’d be reviewed within a day. You never know though!
I started to worry when the review had taken more than 2 days. A status of In Review for more than a few hours is uncommon. I was concerned. Alas, the rejection email came in. And it wasn’t what I expected:
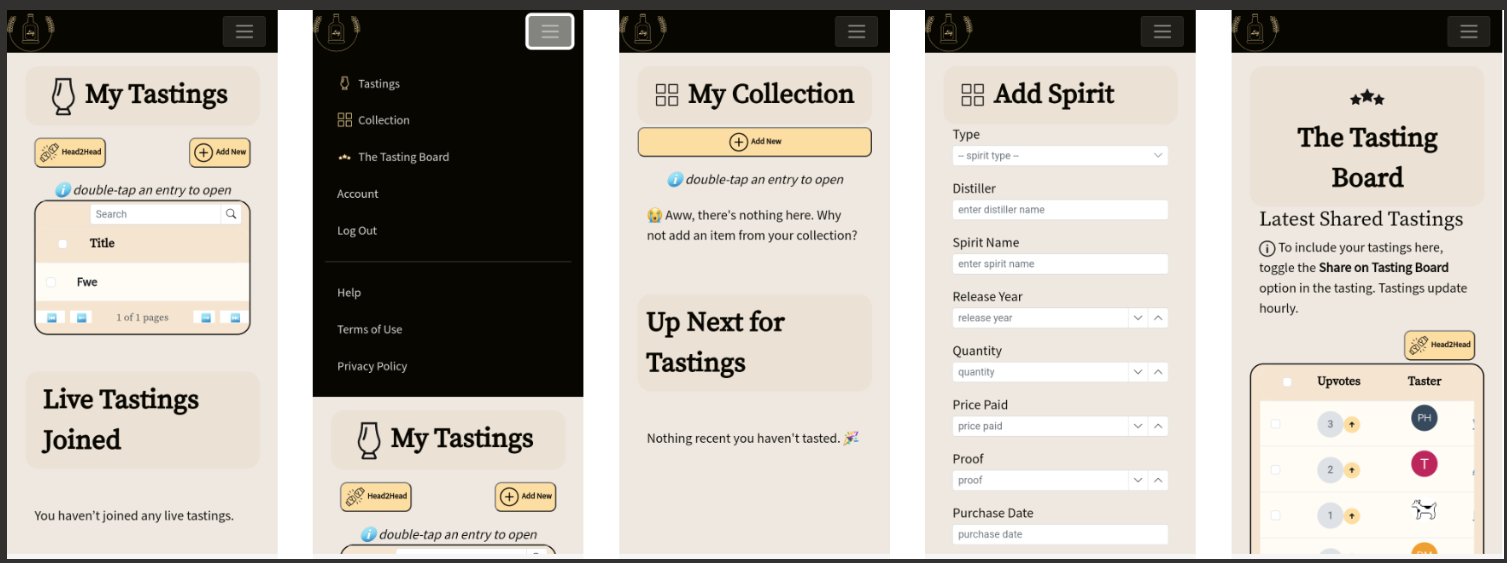
First, I don’t know what “all parts of the metadata” means. I think it’s telling me my provided app screenshots and what’s in the app don’t match its description. Specifically, “track your bottles” and “see what you’ve tasted.” Let’s look at their screenshot:
So that’s their “proof” my app is misleading. But what’s this? Their screenshots show exactly what my app description details. Tastings and Collection. It’s all right there.
I’m guessing this is just a case of AI making a mistake judging my app. I don’t blame Google – they probably get a lot of submissions, and have minimal resources to look at them. Remember all those layoffs?
I submitted an appeal. They said it would take 2 days.
I received an email saying it might take longer than 2 days. OK, let’s be patient.
One week later, I finally received a notice that my appeal was accepted. All I had to do – though it wasn’t entirely clear in the email – was resubmit my app. I did that and started to wait.
Two days later, it still was In Review. “Oh, no…” I was thinking to myself… Not this again… Don’t reject me again, AI.
Thankfully, a few days after, my app was finally approved. Wow, unexpected. But I’m happy 😀🎉
While in Nashville, having just torched my insides with a fiery hot chicken sandwich from Prince’s, I passed by the all-glass enclosed Apple store on the corner of 5th & Broadway. It was about 6pm, and observations would indicate the evening had already started in the morning for most people. It was my last night in town and the Apple store got me thinking about the Vision Pro, my Quest 3, the 250,000 units Apple had sold to date, and of the articles claiming you could get a demo. So I walked in and asked “Can I get a demo of the Vision Pro?” “Sure! We may have an appointment left,” the friendly associate exclaimed. 7pm was available. I handed them my deets, and went off to drop some shopping goodies off at my hotel a few blocks away.
The Pre-Demo Setup
Before I even left the store, Apple had texted me a pre-demo survey. It was primarily concerned with whether I wore glasses (I do now), and whether I used them for near or far sightedness, or both. I answered the questions and Apple told me I was all set.
Apple’s pre-demo survey recommended I use the Zeiss inserts.
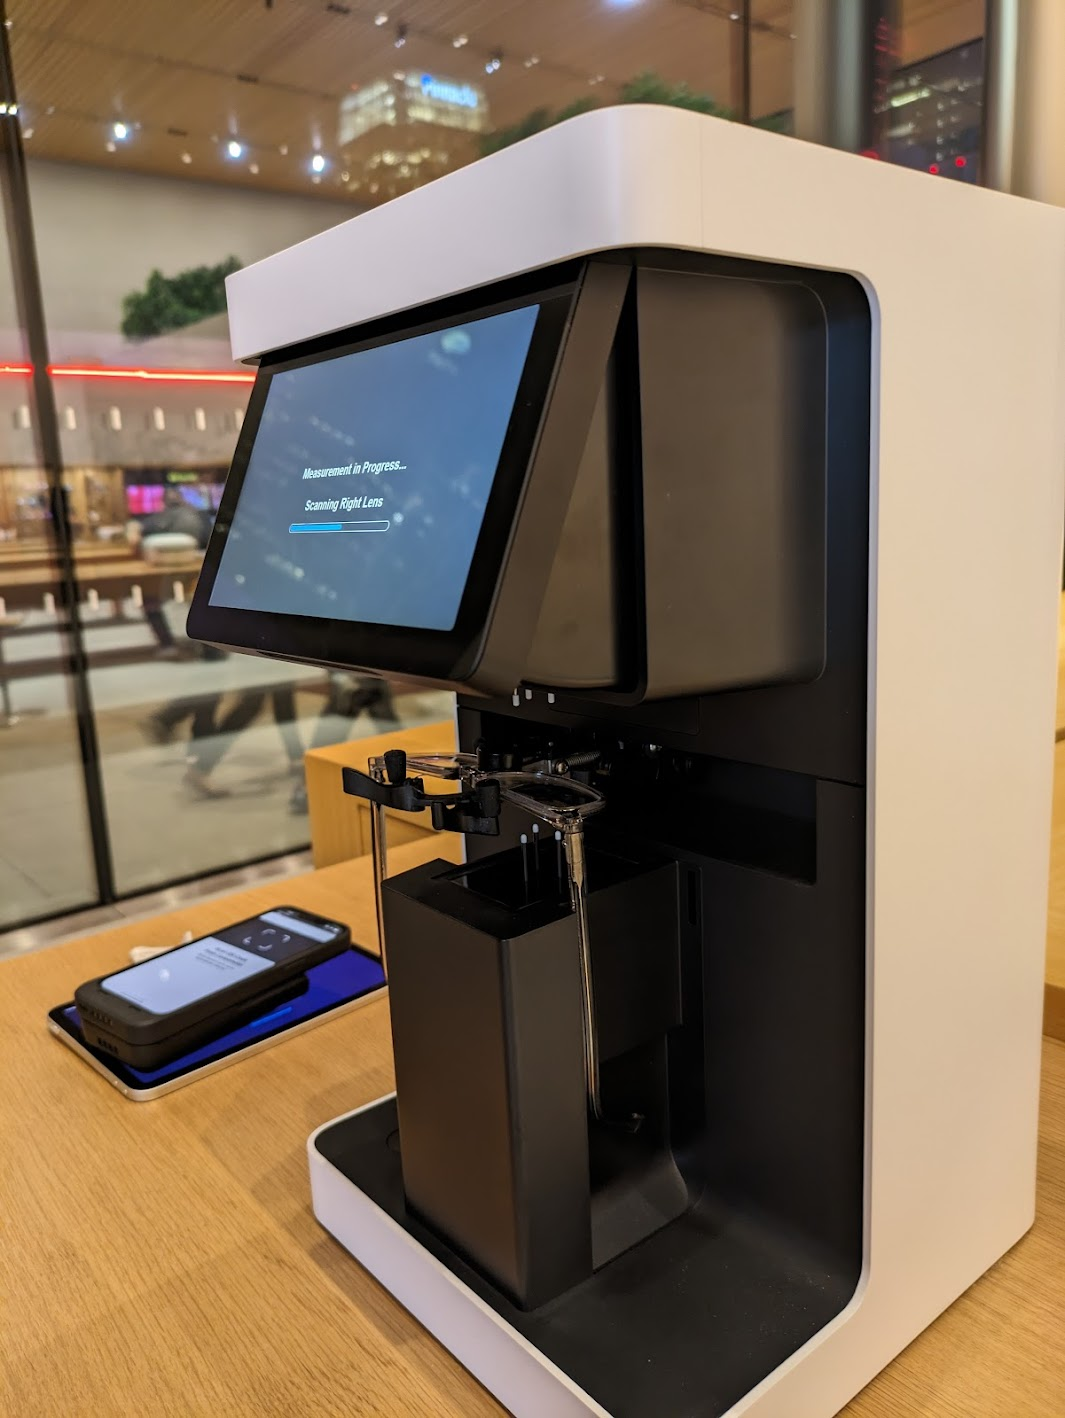
I strolled back into the store close to 7pm. They greeted me quickly with “You’re back!” Well, “I’m a man of my word” I exhorted, and followed them to the back of the store for the demo. Sam would be talking me through the demo. But first they needed my glasses so they could measure them with a fancy, expensive looking measurement machine. I think I’ve seen the same device at Warby Parker. They needed this to set up the Vision Pro for my exact prescription. This begged the question, “So what if my prescription changes? Do I need a new set of inserts?” “Yes, you would need to order new inserts” she explained. I didn’t see her add any inserts, so I was a bit confused by this, but why die on that hill? My guess is the Vision Pro adjusts by itself once provided the script details, but who knows. I sure hope I wouldn’t need to buy new adapters, err “inserts,” after already spending thousands of dollars on this thing. And of course – at this time – you can only buy Apple’s special Zeiss inserts, which I’m sure are a pretty penny.
The lens scanning machine.
After my eyes were ready, I also had to use an iPhone to scan my face. This process wasn’t working well until I moved to the solid-colored wall. The app just kept missing the scan. Sam was a bit frustrated as well, but she kept her cool.
Now, keep in mind, I’ve owned a Meta Quest 3 for a few months now. I was 100% comparing the setup process of that under $500 device to the setup process of a $3,500 (base!!) device here. With the Quest, I just put the unit on my head after some simple setup, and just kept my glasses on. I’m curious how much of this pomp and circumstance is actually necessary, or might be removed in a future software update for the Vision Pro.
Seeing all the work and equipment that went into just getting the unit to be “ready for me” helped me understand the price point. The optical equipment, the personnel, the technology for such a customized experience, has to come from somewhere. Given Apple would have raked in around $1.125B after selling 250K units, I hope they’ve recouped their costs. Now if only there were an iFixit teardown… Oh wait, there is!😀
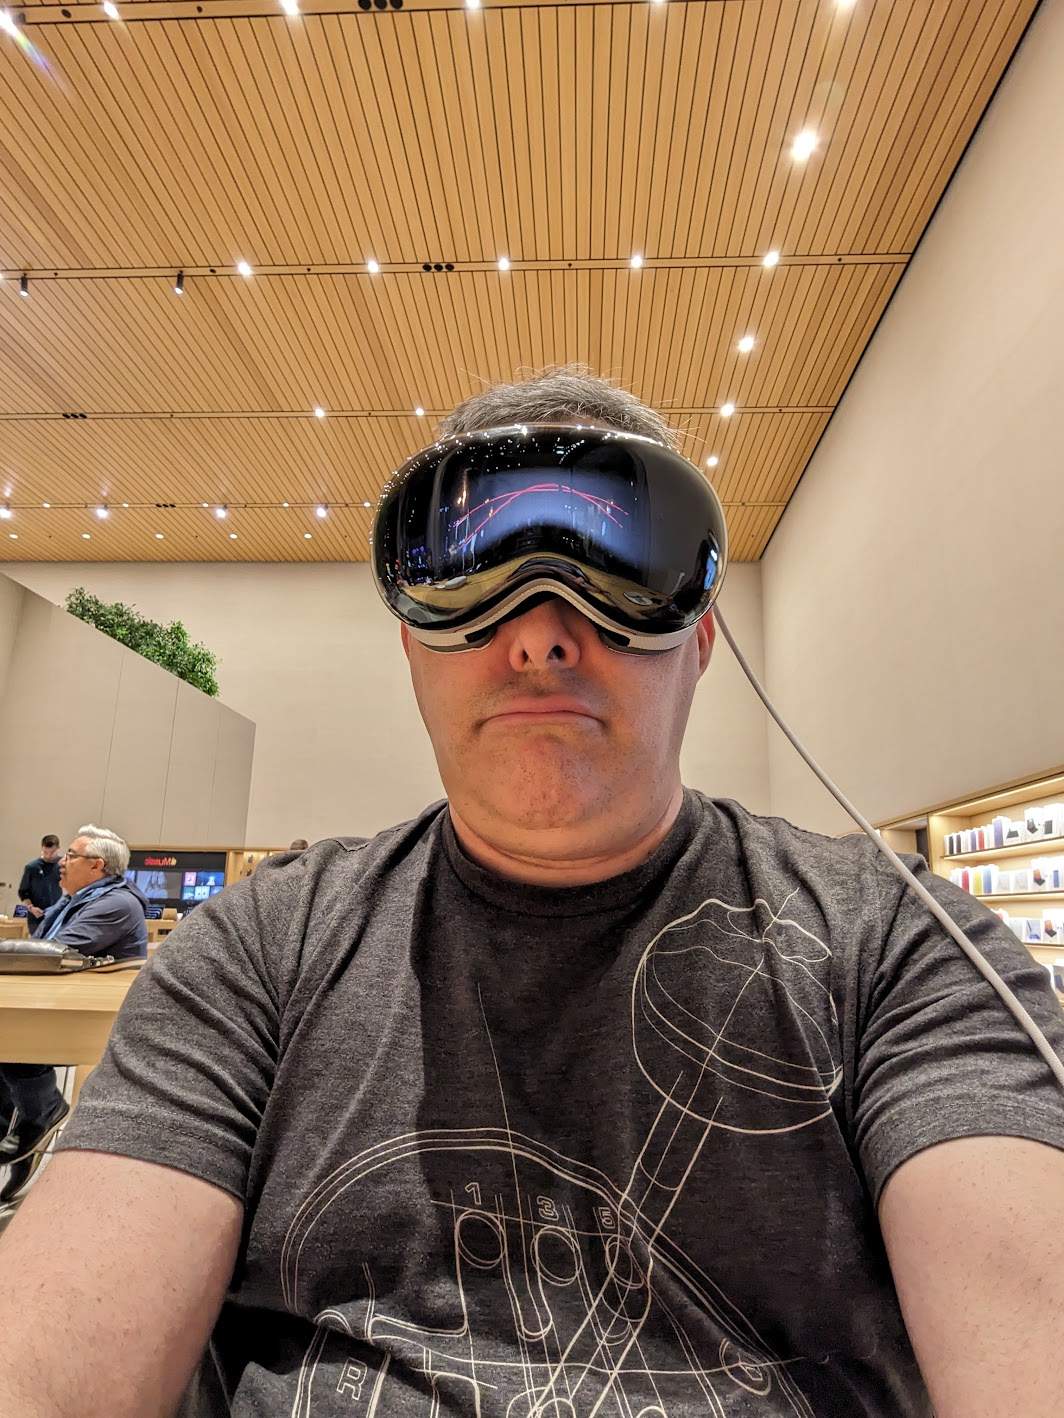
Note that the entire demo was done while in a sitting position. I was sitting on a chair next to a wooden table. One other person was experiencing a demo at the same time.
Fit and Finish
Sam showed me what the buttons do – a button for the see-through mode, and a “digital crown” like the Apple watch. She also showed me the exact way to place the Vision Pro on my head. Thumb under the nosepiece, and four fingers on the top. Don’t touch the front! I asked what would happen if I did – would it just look ugly? She said yeah, it wouldn’t look good, but otherwise probably nothing. I followed her advice and put the unit on my head. I used the right-hand dial to tighen the unit as close as possible to my liking. Note that, because of the Zeiss inserts, I did not need my glasses on for the demo.
The “eyes” passthrough wasn’t part of the demo.
Once the Vision Pro was on my noggin’ I realized how heavy it is. I have a Quest 3 at home. This unit clearly felt heavier. It wasn’t uncomfortable, but it did feel like I had a decent size computer on my head, which of course I did. Sam suggested I move the strap around a bit. After somem finagling, I figured this was as good as it was going to get. It didn’t feel like it was going to fall off. It just felt front-heavy, like the top-heavy feeling I get when my bourbon-belly body is on rollerblades. I did a search, and the Quest 3 is around 515 grams, while the Vision Pro is around 532.
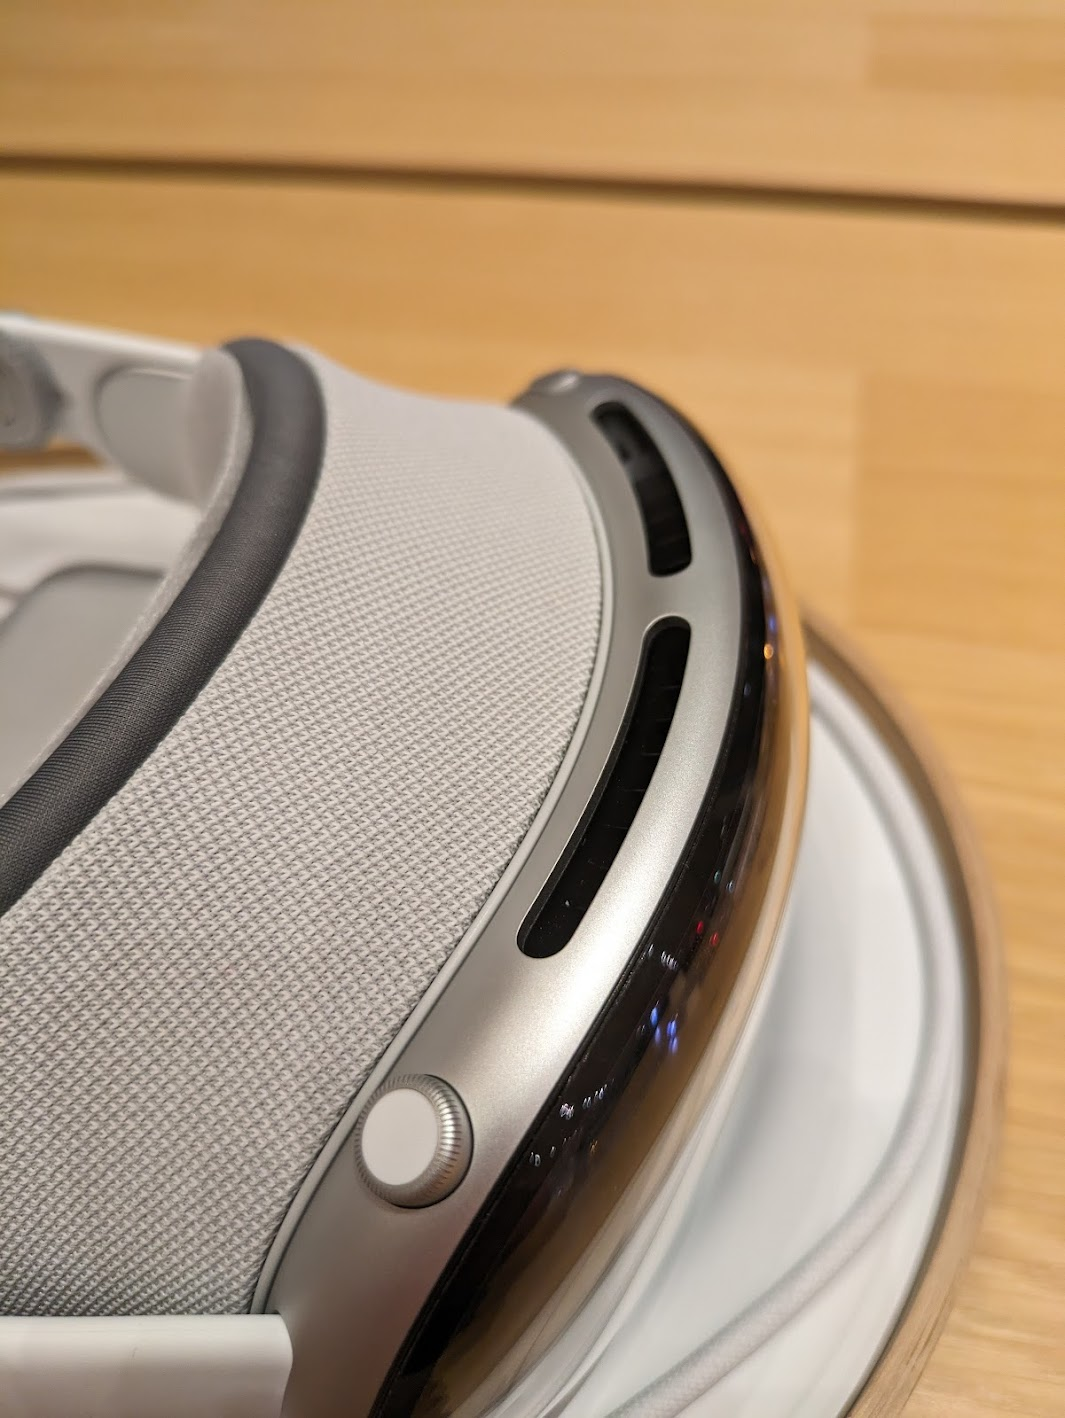
Moving my fingers around I also found the digital crown to be too small. I would use this control device later, and I have to tell you, it needs to be bigger. When you can’t see something, and you want to do small movements with it, and it’s already small, it’s frustrating. Yes, it’s cool, and it fits with the Apple ecosystem, but this needed to be adjusted.
The Digital Crown.
Now, the quality of the materials is top-notch. The strap was incredibly comfortable and disappeared as I used the product. Everything looks clean and precisely engineered. Even the carrying case looks like a high-end The North Face affair. The heaviness did not disappear, however.
The Demo
I should have mentioned earlier that Sam explained she could see everything I was seeing. She had an iPad wirelessly streaming the feed from the Vision Pro. She also had an iPhone that appeared to have the demo script. It was clear Apple wants this demo staged and not free-form. When I would pinch and zoom or move a window before being prompted, Sam would gently verbally nudge me with “Please wait for me.” Sorry, Sam!
First things first was the setup mode. The Vision Pro walked me through mapping my touching and vision. The vision part was interesting – I had to look at each dot on the screen and then pinch my fingers together to “tap” it. Moving my eyes, not necessarily my head, would move an invisible pointer. At the center of my vision – what I’m looking at – becomes what’s selected. It was also incredibly clear and vibrant – so whatever the Zeiss and vision calibration did, it did it well.
The experience is also fascinating from a UI and UX perspective. The center stays focused while items in my “peripheral” vision go out of focus when I move my head, coming into slightly better focus when I stop. In practice, this worked very well. However, the selecting and tapping part was not 100%. I’d say 3 out of 10 times – 30% – when I tried tapping something, the Vision Pro wouldn’t register the tap. Perhaps my hand was under the demo table and I didn’t realize it – but moving my hand closer to the device or further in front of me seemed to solve the issue. I also had to ensure I didn’t lose focus on what I wanted to tap, or I would “miss” or tap the wrong item. After some time using this, I’m sure it would become natural. For the most part it was – but it was clear after 30 minutes Apple has some tweaking to do in its UX, and I can see why this is a scripted demo. But still, damn, it’s amazing.
Once setup was complete, the Apple logo appeared, and I was greeted with the Home Screen. Yes, it looks like the typical iOS home screen layout, just in front of you with your surroundings in semi-transparent fashion in the background. You can tune out your surroundings by rotating the digital crown. I was only allowed to use on of the virtual backgrounds. Sam wouldn’t let me play with others, and she could clearly see via her iPad if I broke the rules. What I did experience, though, was a calming lakeside landscape. It even started raining while I was “there” and that was quite cool, and would have been calming had I not been in the middle of an Apple store. The speakers were loud enough for me to hear the raindrops, but I wasn’t there for that experience. Before you ask – no, I didn’t get a chance to set up the see-through mode that shows my eyes. That’s not part of the demo.
There are three basic gestures on the Vision Pro: Tap, Tap and Drag, and Pinch/Pull to Zoom. The first two are single-hand gestures performed with your dominant hand. The latter requires both hands, and gives you the feeling you’re in [insert Sci-Fi movie here] and manipulating virtual screens in the clear space in front of you. Yeah, it’s pretty cool. Another verbal wrist slap from Sam for me getting ahead of the game.
Demo 1 – Photos
The first demo was launching the classic Apple Photos app. There were many to choose from. Some were “flat” while others had the 3D depth old 3D Android phones were capable of many years ago. Remember the HTC Evo 3D? The flat photo was, well, a photo, and I could zoom in and out as expected. It was perfectly clear, and the colors were sharp and realistic. The 3D photo had true depth, and was shot on an iPhone 15 Pro. Both the 15 Pro and Pro Max support creating 3D and immersive content for the Vision Pro. Apple’s pushing those devices as content creation catalysts, understandbly. Because it was a scripted store demo, I didn’t ask for additional details like format support and technical details. My understanding is other 3D formats are supported, so you’re not limited to just Apple ecosystem solutions.
Demo 2 – Videos
Now for the fun part – video. There was no demo of a flat video here, and that’s fine. Who cares? Every headset does it. You’re not spending $3,500+ for a simple movie theater. There were two demos – one 3D video that wasn’t immersive, meaning it didn’t surround you, and another immersive sports video. The 3D video was cool – a family blowing out the candles on a cake. The frame rate seemed low, maybe 30fps, and reminded me of 3D video from those old 3D Android phones I talked about. It was neat that it was “large” in front of me, but it wasn’t mind-blowing due to having seen it before. Now, I’d like to know if the Quest 3 can do the same. Sam did not appreciate that I played the video more than once. To be fair, she had a lot of patience with me – thank you Sam!
The real treat was the immersive video compilation. It had many immersive videos, all being narrated by someone telling me how great “living the action” is. One was shot with a 360 degree (I think) camera placed on a soccer goal and I could see the game and the ball being kicked into the net. Another was a mountain landscape and I was watching the climber. Another was shot behind first base during a double play. You get the point – incredible action sequences to make you feel like you are there. And it did. It was exhilarating. I recall Sam explaining it was all 8K video. I asked if the screens themselves were 8K, but she wasn’t sure. The detail was phenomenal. Absolutely stunning.
Is there a new market here?
My first thought was Apple TV Plus – what if they started offering this type of content? Is that where it’s headed? I don’t know if it’s viable. Many of you may remember the many, many, MANY failures of trying to bring 3D into the home. Projectors, TVs, special glasses – and the fact 30% of human beings can’t watch 3D content without getting nauseous – it never worked. But they also didn’t have the content, other than more expensive 3D versions of Blu-ray discs. Could Apple stream this type of content? Could they convince people to wear these headsets while watching events such as concerts? I’m not convinced about sports, as I can’t see a bunch of people wearing headsets and drinking beer… Now that I’d like to see. If people generally look funny in VR, that would be a hoot. My point is, Apple certainly has the market position and technologies to make something happen here. What, I’m not yet sure… And Meta may be willing to play ball. If the monopoly regulators have their way, it may be a perfect match…
Demo 3 – Web Browsing and Compatible Apps
The last demo was showing that I could browse the web (Safari, yay?) and run “compatible apps” from the App Store. Meh. It’s iOS, so no surprises here. Cool, but no compelling killer app. The demo app Sam wanted me to run was a cooking app. I won’t be wearing a $3,500 + tax headset near the stove.
The Missing Demo
The Vision Pro content demos were impressive, to be sure. But where was the killer app to sell me on this $3,500 device? Sam kept telling me how this was a “Spatial Computing” device. But never did I see an example of spatial computing. I saw spatial consuming but not spatial creating. I would love to see the results of a survey of the 250,000 purchasers of this product explaining why… and what their income bracket is.
Final Thoughts
I took the Vision Pro off my head and handed it back to Sam. I did this the proper way… thumb under the nosepiece and four fingers on top. I thanked her for the experience and agreed it was quite impressive. I asked how many of these they sold each day. She couldn’t say, other than some people come in and simply buy one outright, no demo needed. It wouldn’t have been fair to ask her why – she’s just selling the unit, and knows fervent Apple fans with an Apple Credit Card are often willing to buy more Apple products (I jest).
But after the demo, I had no incentive to purchase the unit. There was nothing about it, at least during this entertaining 30 minute demo, that left a compelling reason on the table. Certainly not one that made me go “Gosh, I wish my Quest 3 did that!” I do need to determine if the Quest 3, at 1/6 the price, can do 3D video (UPDATE: It does!). But the Vision Pro demo was all about content consumption, and the Quest 3 does effectively the same thing in spades. Oh, and I can play VR games made specifically for its platform (noticeably absent from the Apple demo, but also understandable given the time constraints).
I also left with the feeling of possibility. What the Vision Pro represents, and what could come from such technology, finally, in the content consumption space. And maybe, eventually, in the content creation space, if Apple’s professional applications arm releases whatever they’ve got cooking. Who cares what you call it – spatial computing, VR, or otherwise – if you build something truly compelling.
Either way, the demo was worth it, I got my technologist buzz and my analyst gears working, and still have $3,500 to spend on something else.
I recently started in the Fishers Youth Mentoring Initiative, and my mentee is a young man in junior high who really likes lizards. He showed me photos of them on his iPad, photos of his pet lizard, and informed me of many lizard facts. He’s also a talented sketch artist – showcasing many drawings of Pokemon, lizards and more. Oh, yeah, he’s also into computers and loves his iPad.
Part of the mentoring program is to help with school, being there as they adjust to growing up, and both respecting and encouraging their interests.
It just so happens that he had a science project coming up. He wasn’t sure what to write about. His pet lizard recently had an attitude shift, and he figured it was because it wasn’t getting as much food week over week. Changing that, he realized its attitude changed. So, he wanted to cover that somehow.
Seeing his interest in lizards, drawing, and computers I asked if we could combine them. I suggested we build an app, a “Reptile Tracker,” that would help us track reptiles, teach others about them, and show them drawings he did. He loved the idea.
Planning
We only get to meet for 30 minutes each week. So, I gave him some homework. Next time we meet, “show me what the app would look like.” He gleefully agreed.
One week later, he proudly showed me his vision for the app:
I said “Very cool.” I’m now convinced “he’s in” on the project, and taking it seriously.
I was also surprised to learn that my expectations of “show me what it would look like” were different from what I received from someone both much younger than I and with a different world view. To him, software may simply be visualized as an icon. In my world, it’s mockups and napkin sketches. It definitely made me think about others’ perceptions!
True to software engineer and sort-of project manager form, I explained our next step was to figure out what the app would do. So, here’s our plan:
Identify if there are reptiles in the photo.
Tell them if it’s safe to pick it up, if it’s venomous, and so forth.
Get one point for every reptile found. We’ll only support Lizards, Snakes, and Turtles in the first version.
Alright, time for the next assignment. My homework was to figure out how to do it. His homework was to draw up the Lizard, Snake, and Turtle that will be shown in the app.
Challenge accepted!
I quickly determined a couple key design and development points:
The icon he drew is great, but looks like a drawing on the screen. I think I’ll need to ask him to draw them on my Surface Book, so they have the right look. Looks like an opportunity for him to try Fresh Paint on my Surface Book.
Azure Cognitive Services, specifically their Computer Vision solution (API), will work for this task. I found a great article on the Xamarin blog by Mike James. I had to update it a bit for this article, as the calls and packages are a bit different two years later, but it definitely pointed me in the right direction.
Writing the Code
The weekend came, and I finally had time. I had been thinking about the app the remainder of the week. I woke up early Saturday and drew up a sketch of the tracking page, then went back to sleep. Later, when it was time to start the day, I headed over to Starbucks…
I broke out my shiny new MacBook Pro and spun up Visual Studio Mac. Xamarin Forms was the perfect candidate for this project – cross platform, baby! I started a new Tabbed Page project, brought over some code for taking photos with the Xam.Plugin.Media plugin and resizing them, and the beta Xamarin.Essentials plugin for eventual geolocation and settings support. Hey, it’s only the first week
Side Note: Normally I would use my Surface Book. This was a chance for me to seriously play with MFractor for the first time. Yay, even more learning this weekend!
Now that I had the basics in there, I created the interface for the Image Recognition Service. I wanted to be able to swap it out later if Azure didn’t cut it, so Dependency Service to the rescue! Here’s the interface:
using System.IO;
using System.Threading.Tasks;
using Microsoft.Azure.CognitiveServices.Vision.ComputerVision.Models;

namespace ReptileTracker.Services
{
     public interface IImageRecognitionService
     {
         string ApiKey { get; set; }
         Task<ImageAnalysis> AnalyzeImage(Stream imageStream);
     }
}
Now it was time to check out Mike’s article. It made sense, and was close to what I wanted. However, the packages he referenced were for Microsoft’s Project Oxford. In 2018, those capabilities have been rolled into Azure as Azure Cognitive Services. Once I found the updated NuGet package – Microsoft.Azure.CognitiveServices.Vision.ComputerVision – and made some code tweaks, I ended up with working code.
A few developer notes for those playing with Azure Cognitive Services:
Hold on to that API key, you’ll need it
Pay close attention to the Endpoint on the Overview page – you must provide it, otherwise you’ll get a 403 Forbidden
And here’s the implementation. Note the implementation must have a parameter-less constructor, otherwise Dependency Service won’t resolve it.
using Microsoft.Azure.CognitiveServices.Vision.ComputerVision;
using Microsoft.Azure.CognitiveServices.Vision.ComputerVision.Models;
using System;
using System.Collections.Generic;
using System.Diagnostics;
using System.IO;
using System.Threading.Tasks;
using ReptileTracker.Services;
using Xamarin.Forms;

[assembly: Dependency(typeof(ImageRecognitionService))]
namespace ReptileTracker.Services
{
    public class ImageRecognitionService : IImageRecognitionService
    {
        /// <summary>
        /// The Azure Cognitive Services Computer Vision API key.
        /// </summary>
        public string ApiKey { get; set; }

        /// <summary>
        /// Parameterless constructor so Dependency Service can create an instance.
        /// </summary>
        public ImageRecognitionService()
        {

        }

        /// <summary>
        /// Initializes a new instance of the <see cref="T:ReptileTracker.Services.ImageRecognitionService"/> class.
        /// </summary>
        /// <param name="apiKey">API key.</param>
        public ImageRecognitionService(string apiKey)
        {

            ApiKey = apiKey;
        }

        /// <summary>
        /// Analyzes the image.
        /// </summary>
        /// <returns>The image.</returns>
        /// <param name="imageStream">Image stream.</param>
        public async Task<ImageAnalysis> AnalyzeImage(Stream imageStream)
        {
            const string funcName = nameof(AnalyzeImage);

            if (string.IsNullOrWhiteSpace(ApiKey))
            {
                throw new ArgumentException("API Key must be provided.");
            }

            var features = new List<VisualFeatureTypes> {
                VisualFeatureTypes.Categories,
                VisualFeatureTypes.Description,
                VisualFeatureTypes.Faces,
                VisualFeatureTypes.ImageType,
                VisualFeatureTypes.Tags
            };

            var credentials = new ApiKeyServiceClientCredentials(ApiKey);
            var handler = new System.Net.Http.DelegatingHandler[] { };
            using (var visionClient = new ComputerVisionClient(credentials, handler))
            {
                try
                {
                    imageStream.Position = 0;
                    visionClient.Endpoint = "https://eastus.api.cognitive.microsoft.com/";
                    var result = await visionClient.AnalyzeImageInStreamAsync(imageStream, features);
                    return result;
                }
                catch (Exception ex)
                {
                    Debug.WriteLine($"{funcName}: {ex.GetBaseException().Message}");
                    return null;
                }
            }
        }

    }
}
And here’s how I referenced it from my content page:
pleaseWait.IsVisible = true;
pleaseWait.IsRunning = true;
var imageRecognizer = DependencyService.Get<IImageRecognitionService>();
imageRecognizer.ApiKey = AppSettings.ApiKey_Azure_ImageRecognitionService;
var details = await imageRecognizer.AnalyzeImage(new MemoryStream(ReptilePhotoBytes));
pleaseWait.IsRunning = false;
pleaseWait.IsVisible = false;

var tagsReturned = details?.Tags != null
                   && details?.Description?.Captions != null
                   && details.Tags.Any()
                   && details.Description.Captions.Any();

lblTags.IsVisible = true;
lblDescription.IsVisible = true;

// Determine if reptiles were found.
var reptilesToDetect = AppResources.DetectionTags.Split(',');
var reptilesFound = details.Tags.Any(t => reptilesToDetect.Contains(t.Name.ToLower()));

// Show animations and graphics to make things look cool, even though we already have plenty of info.
await RotateImageAndShowSuccess(reptilesFound, "lizard", details, imgLizard);
await RotateImageAndShowSuccess(reptilesFound, "turtle", details, imgTurtle);
await RotateImageAndShowSuccess(reptilesFound, "snake", details, imgSnake);
await RotateImageAndShowSuccess(reptilesFound, "question", details, imgQuestion);
That worked like a champ, with a few gotchas:
I would receive a 400 Bad Request if I sent an image that was too large. 1024 x 768 worked, but 2000 x 2000 didn’t. The documentation says the image must be less than 4MB, and at least 50×50.
That API endpoint must be initialized. Examples don’t always make this clear. There’s no constructor that takes an endpoint address, so it’s easy to miss.
It can take a moment for recognition to occur. Make sure you’re using async/await so you don’t block the UI Thread!
Prettying It Up
Before I get into the results, I wanted to point out I spent significant time prettying things up. I added animations, different font sizes, better icons from The Noun Project, and more. While the image recognizer only took about an hour, the UX took a lot more. Funny how that works.
Mixed Results
So I was getting results. I added a few labels to my view to see what was coming back. Some of them were funny, others were accurate. The tags were expected, but the captions were fascinating. The captions describe the scene as the Computer Vision API sees it. I spent most of the day taking photos and seeing what was returned. Some examples:
My barista, Matt, was “a smiling woman working in a store”
My mom was “a smiling man” – she was not amused
Most of the time, as long as the subjects were clear, the scene recognition was correct:
Or close to correct, in this shot with a turtle at Petsmart:
Sometimes, though, nothing useful would be returned:
I would have thought it would have found “White Castle”. I wonder if it won’t show brand names for some reason? They do have an OCR endpoint, so maybe that would be useful in another use case.
Sometimes, even though I thought an image would “obviously” be recognized, it wasn’t:
I’ll need to read more about how to improve accuracy, if and whether that’s even an option.
Good thing I implemented it with an interface! I could try Google’s computer vision services next.
Next Steps
We’re not done with the app yet – this week, we will discuss how to handle the scoring. I’ll post updates as we work on it. Here’s a link to the iOS beta.
Some things I’d like to try:
Highlight the tags in the image, by drawing over the image. I’d make this a toggle.
Clean up the UI to toggle “developer details”. It’s cool to show those now, but it doesn’t necessarily help the target user. I’ll ask my mentee what he thinks.
Please let me know if you have any questions by leaving a comment!
Want to learn more about Xamarin? I suggest Microsoft’s totally awesome Xamarin University. All the classes you need to get started are free.
Update 2018-11-06:
The tags are in two different locations – Tags and Description.Tags. Two different sets of tags are in there, so I’m now combining those lists and getting better results.
I found I could get color details. I’ve updated the accent color surrounding the photo. Just a nice design touch.
Want to learn all about Xamarin and how you can use it, while not spending most of your time watching code scroll by in a video? I figured there was room for an explainer without being a close-captioner for a code tutorial. Enjoy my latest video!
Have you been considering Xamarin for your cross-platform mobile app? This presentation will help.
In this non-code-heavy presentation, we’ll discuss:
* What is Xamarin
* Development Environment Gotchas
* Creating a Sample To Do List App without writing any code
* Reviewing a real Xamarin app that’s “in the wild”
* Review native, platform-specific integrations
* Discuss gotchas when using Xamarin, and mobile apps in general
* Answer audience questions
Why not code-heavy? Because there are many examples you can follow online. This presentation will provide valuable information you can consider while reviewing the myriad of tutorials available to you with a simple Bing or Google search, or visiting Pluralsight, Microsoft Virtual Academy, or Xamarin University.
If you have any feedback, please leave in the comments, or ask me on Twitter: @Auri
Here are the links relevant for this presentation:
Indy.Code Slides with Cost and Performance Figures: https://1drv.ms/p/s!AmKBMqPeeM_1-JZR4…
(you can find the Indy.Code() presentation on my YouTube channel)
I’m continuing my resolution to record as many of my programming and technical presentations as possible. I recently spoke at the inaugural Indy.Code() conference. It was excellent, with an incredible speaker line-up. I hope they, too, post some of their presentations online!
Should you write your app “native” or use a “cross-platform” solution like React Native, Xamarin, or NativeScript? The new wave of native-cross-compiling solutions provide significant cost savings, code reuse opportunities, and lower technical debt. Does wholly native, per platform development, still play a role in future mobile development? Let’s discuss together.
In this presentation, we’ll discuss:
The growth of native, hybrid, and cross-platform mobile development solutions
Cost analysis of multiple native and cross-platform apps
Considerations for each native and cross-platform solution
I’ve been struggling with carrying a Mac and PC for Xamarin development for a couple years now. Wouldn’t it be nice to just run OS X in a VM so I could use my Surface Book and not mess with the Apple ecosystem more than necessary? Well, I finally got it working, thanks in large part to the work that’s been done by many people, links of which I’ll credit in this article. Thanks, all!
Requirements
macOS X Sierra Installer, or a machine with Sierra installed – extraction details below
Intel powered machine, preferably i5 or higher
16GB or larger thumb drive, preferably USB 3
VirtualBox 5.x
Visual Studio 2015 or higher
If on a laptop, you’re plugged in
Create the OS X Installer USB Drive
First things first – you’ll need a Mac running Sierra and at least a 16 GB USB thumb drive. We’ll be using Unibeast, Multibeast, and the Clover bootloader. I imagine you own both Mac OS and the drive. I’d go the USB 3.0 or higher route so things run a bit faster. We’ll be extracting a Sierra installer in a moment. If you’re all set with the above, follow the instructions at the awesome Tony Mac x86 website. Special thanks to the Hackintosh website. When asked whether to use UEFI or Legacy boot mode, choose Legacy. Here is a marked-up PDF of the article in case the link doesn’t work.
In a nutshell, here’s what you’ll be doing in this step:
Insert the thumb drive into the Mac. Launch Disk Utility and format the USB drive with the name USB and the format of GUID Partition Map.
Download the macOS Sierra installer via the App Store. The installer will be saved in your Applications folder. Make a copy of it somewhere, just in case it gets deleted and you need it again. Don’t move the installer.
Download and Run Unibeast and follow the prompts. Use Legacy boot mode. You’ll need a [free] account on the Tony Mac x86 site to download, fyi.
Let Unibeast create the thumb drive. This will take about 10 minutes on a USB 3 drive.
Download and Copy Multibeast to the newly created Unibeast drive.
You’re now ready to start configuring VirtualBox.
Create the VirtualBox USB Drive Shim
You have a USB thumb drive, but VirtualBox doesn’t make it easy to boot from such a device. You’ll need to create a fake virtual disk that points to the USB drive. This tutorial walks you through it. Here’s a PDF if that link doesn’t work.
In a nutshell, here’s what you’ll be doing in this step:
Open Disk Management and get the Disk Number of the thumb drive, as shown below
You’re now ready to create the VirtualBox virtual machine.
Create the VM
Windows won’t allow VirtualBox to use the USB shim you just created unless you launch with administrator privileges. Right-click VirtualBox and select Run as Administrator. VirtualBox should open. Then, follow the instructions on this page.Ignore the download portion – you already have an install thumb drive, and you just want the VM configuration steps. If that link doesn’t work, here’s a PDF.
In a nutshell, here’s what you’ll be doing in this step:
Create a new Virtual Machine, name it Sierra – although that’s not a requirement – and choose OS X 64-bit as the guest OS. VirtualBox’s settings aren’t fully correct, but we’ll get there.
Choose 4 GB of RAM. I didn’t test with any other memory configs. So, YMMV if you go another route.
When asked which drive to use, choose an existing drive, and select the USB shim you created in the previous section. The example above saved the file as usb.vmdk at the root of C:
You should now have a VM, like every other time you’ve used VirtualBox 🙂
Add another Virtual Disk to stand in as your Mac’s hard drive. I suggest VDI format, dynamically sized, and 60 GB in size. Ignore that my screen shot shoes 40 GB <grin> In future steps you’ll need to install XCode and Xamarin Studio. Don’t skimp on size here or you’ll be reinstalling later. Much sad.
Note: XCode uses a lot of space when it updates. Don’t skimp on virtual disk size. If that’s a big deal, save the VM’s drive to a location that will have enough space.
Once you’ve added the hard drive, you’ll need to finish configuring the VM. You already have an installer on the thumb drive.
Aside from the defaults, confirm the settings you have match settings below. I’ve also included some screen shots a little further down.
After performing the steps above, you’ll be using the following settings in your VM:
System, Motherboard, Base Memory: 4096 MB
System, Motherboard, Boot Order: Only Optical and Hard Disk checked
System, Motherboard, Pointing Device: USB Tablet
System, Motherboard, Chipset: ICH9
System, Motherboard, Extended Features: Enable I/O APIC, Enable EFI, Hardware Clock in UTC Time, all checked
System, Processor, Processors: 2 CPUs
System, Processor, Execution Cap: 100%
System, Processor, Enable PAE/NX: Checked
Display, Screen, Video Memory: 128 MB
Display, Screen, Monitor Count: 1
Display, Screen, Scale Factor: 100% (you can change this later if you’re on a high-res display)
Display, Screen, Accelerator: 3D and 2D both unchecked
Storage: One controller, first item is USB shim, then the hard drive and “Empty” optical drive. The order of those two don’t matter.
After configuring the VM in the UI, close VirtualBox and run the following commands, of which I’ve created a convenient all-in-one script here. You may need to edit it depending on what you named your VM.
These make the appropriate settings to fool OS X to thinking you’re on a real Mac.
cd "C:\Program Files\Oracle\VirtualBox\"

VBoxManage modifyvm "Your VM Name" --cpuidset 00000001 000106e5 00100800 0098e3fd bfebfbff

VBoxManage setextradata "Your VM Name" "VBoxInternal/Devices/efi/0/Config/DmiSystemProduct" "iMac11,3"

VBoxManage setextradata "Your VM Name" "VBoxInternal/Devices/efi/0/Config/DmiSystemVersion" "1.0"

VBoxManage setextradata "Your VM Name" "VBoxInternal/Devices/efi/0/Config/DmiBoardProduct" "Iloveapple"

VBoxManage setextradata "Your VM Name" "VBoxInternal/Devices/smc/0/Config/DeviceKey" "ourhardworkbythesewordsguardedpleasedontsteal(c)AppleComputerInc"

VBoxManage setextradata "Your VM Name" "VBoxInternal/Devices/smc/0/Config/GetKeyFromRealSMC" 1
Boot the VM and Install Sierra
Alright, we’re ready to boot! Re-launch VirtualBox as an administrator and start up. After a bunch of Unix style text scrolling, you should see the Apple logo appear and begin to load macOS. If not, something’s configured wrong. Read through the above steps and see what you missed. Of course, things may have changed over time, and this tutorial may no longer be valid. Bummer if that’s the case! Much sad. I want you to be much happy.
NOTE: If things appear frozen during boot, wait a minute. In sanity checking this on another machine with a friend, his seemed to be frozen, and then resumed. A watched installer never boils… [terrible joke]
The instructions for installing Sierra are pretty straightforward:
When the installer appears, select the Utilities menu on top, then Disk Utility.
Format the Virtual Hard Disk. I named mine VBox, but that doesn’t matter. Make sure the format is GUID Partition Map and Mac OS Journaled. Do not select the case sensitive option.
When formatting is complete, quit Disk Utility and you’ll be back at the installer.
Select the freshly formatted hard drive and start the install process.
Wait. It took about 20 minutes to install on my 6th Gen Core i7 SSD Surface Book. YMMV.
Keep an eye on the installer. When it’s done, remove the thumb drive. Otherwise, it’ll boot back into the installer. If that happens, wait for the installer to boot so you don’t corrupt anything, then remove the thumb drive, and restart the VM.
When the Mac boots back up, follow the prompts. Do *not* use an Apple account – it won’t let you. Make note of the username – it will be in lowercase – you’ll need that when you enter a username and password for Visual Studio later. Don’t worry about the Apple Account issue, though – this won’t affect your ability to install XCode or use the App Store.
Once setup is complete, shut down the Mac.
In the VM’s settings, remove the USB shim.
OS X is now installed.
From this point forward, you no longer need to run VirtualBox as an administrator. Yay!
NOTE: After configuring OS X, you may be presented with a dialog stating the keyboard cannot be identified. Don’t worry – just follow the prompts and you’ll be all set.
Install Xcode
For OS X to act as a build server, you must have Xcode and Xamarin Studio installed. Let’s install and configure Xcode first.
To complete this step, do the following:
Open the App Store on the Mac
Search for Xcode
Click Get to install it. You’ll need to enter your Apple account credentials.
Wait a while – it’s big and takes a while to install. About 30 minutes on my machine.
Once installed, Launch Xcode, agree to any terms, and let it finish installing components.
When Xcode is finished configuring, open the Xcode menu, select Preferences, then Accounts, and click the + symbol. Enter your Apple Developer Account details.
Great! Xcode is configured! Time to get Xamarin set up.
Install Xamarin Studio
Xamarin Studio handles installing the OS X build agent so you can debug apps with Visual Studio, while performing the necessary build and simulation tasks on the Mac. This is required for licensing reasons, and Apple being a closed system for iOS developers. Boo.
Note: Xamarin Studio may be called Visual Studio for Mac by the time you read this.
First, open Safari – unless you installed something else on the Mac already – and download Xamarin Studio for Mac. This is simple – go to Xamarin.com, and download the installer.
Open the installer on your Mac from the Downloads folder, and click Open when it warns you that it’s an application downloaded from the Internet.
Install everything except Android. You can do Android dev on your PC, so I feel there’s no reason to install it again here. Again, YMMV – do as you wish 🙂 This process can take a while due to downloading and installing many items.
Note: I’m not sure if you need Profiler or Workbooks, so I kept them in there. I’m thinking it’s an insignificant difference.
Another Note: The installer will say it’s installing Android SDK anyway, not sure why! 🙂 I complained to Microsoft about this – it didn’t make sense to me.
Once Xamarin Studio is installed, start it and make sure it comes up.
Under the Xamarin Studio menu item – which may be Visual Studio by the time you read this – select Check for Updates and make sure everything’s up to date.
Note to Visual Studio 2017 Release Candidate Users: If you’re running Visual Studio 2017 Release Candidate, it [annoyingly] installs and targets the alpha channel of Xamarin. You’ll need to switch to the Alpha channel in Xamarin Studio to match this, otherwise Visual Studio will refuse to compile/build/debug through the Mac instance. A channel switching option is available in the Check for Updates menu to address this issue.
In a nutshell, here’s what you’ll be doing in this step:
Press Windows-Space, which translates to Apple-Space, and type remote login to open the Sharing control panel.
Check the box for Remote Login, and select All Users, or at least ensure your user account is in there. You’re on a private network only accessible by your machine, so I see few security issues here. Behind the scenes, this is opening Port 22 for SSH access to your Mac.
Alright, we should be all configured! Let’s switch back to Windows!
Configure VirtualBox Networking and Port Forwarding for Remote Debugging
Now that the Mac is configured, we have to tell VirtualBox how to allow your computer to talk with it. We do this by configuring Port Forwarding in VirtualBox.
Open command prompt and type ipconfig.
Take note of the Ethernet adapter VirtualBox Host-Only Network, which may be #2, #3 etc. You want the one with an IP address. Copy that IP address to the clipboard.
In VirtualBox, open the Settings of your VM, and select Network, then Advanced, then Port Forwarding.
Add a new rule. I named mine Remote Access.
For Protocol, choose TCP.
For Host IP, paste in your host adapter IP.
For Host Port, enter 22.
For Guest Port, enter 22.
For Guest IP, go to your Mac, use Windows-Space to search for Network Utility, and type in the IP that appears there.
Note: It’s possible the Guest IP will change from time to time. This is especially true if the Mac isn’t the only virtual machine you run. If you can no longer connect, check whether you need to update the Guest IP.
VirtualBox is now configured! If you want to verify this, you can launch bash shell on your Windows 10 machine and type ssh username@ipaddress, accept the certificate, and enter your password when prompted. If you can type ls and see your Mac’s files, all is good in the world.
Link Visual Studio to macOS
Alright, hard part’s over. Now we need to configure Visual Studio. The steps for accomplishing this can be found at the same link above, or you can just click here if you don’t want to scroll. There’s also a tutorial in Visual Studio.
In a nutshell, here’s what you’ll be doing in this step:
Launch Visual Studio.
Type Control-Q to access the Quick Access Menu, and type iOS Settings. This will take you to the Xamarin iOS settings pane.
Choose Find Xamarin Mac Agent, follow the prompts to ensure you’ve configured everything properly.
In Enter Mac name or IP address enter your VirtualBox host adapter’s IP. If everything’s configured properly, you should be prompted to enter your Mac’s username and password.
If all went well, a lock-like icon should appear next to the IP address, as shown below. If not, make sure the version of Xamarin installed in Visual Studio is the same as that on the Mac. See my note above about Visual Studio 2017 and its Xamarin Alpha Channel issue.
And, Go!
If everything went well, you should now be able to do all your Windows and Xamarin / Mac development on one machine!
Please provide feedback in the comments. Enjoy!
Tips / Updates
If you’d like to tweak the video resolution, you can follow this article. The command is:
VBoxManage setextradata "VM name" VBoxInternal2/EfiGopMode N

Where N can be one of 0,1,2,3,4,5 referring to the 640x480, 800x600, 1024x768, 1280x1024, 1440x900, 1920x1200 screen resolution respectively
My goal with this article is to build a machine for building a build/test VM. I am not trying to replace a Mac environment for doing lots of work on the Mac side of things.
I struggled with this for a few days while trying to convert a Silverlight video player to HTML5, and finally found an answer. Posting here in case anyone else is having trouble!
You need to specify the format as MPEG DASH to get it to smoothstream the MP4 file to the HTML5 video player. This is done by adding a format parameter to the manifest URL, as follows:
Note the (format=mpd-time-csf) at the end of the URL. There are a number of other formats you can stream, including the Silverlight SmoothStream, Adobe’s streaming format, Apple’s HTTP Live Streaming for iOS devices, and more. This is all done for you automatically by Azure’s Media Services. Pretty darn cool.
I struggled to find this, too, so quite happy I finally got things working. Here’s the source URL from Microsoft for more details: