Posts Tagged ‘Auri Rahimzadeh’

I’ve discussed this a lot on my Developer Rants channel – the cost of AI dev is likely to go up in the next 18 months, and controlling AI development costs will be, I feel, a big deal for most dev teams. This is giving rise to searches for ideal local LLM setups. NVIDIA RTX GPU in a PC or a dedicated Spark box? AMD AI or Mac Mx with unified memory? Intel ARC cards with 32-48 GB?Which model, at which quantization?

I’m still surprised to hear about “AI Leaderboards” and devs being rewarded for spending the most tokens. Never in my career have I seen management reward people for recklessly spending. Never. Even in startups with deadlines. Even in books I’ve read about Facebook. There’s also a bean counter around the corner.

So I decided about a week ago – this is May 2026, for what it’s worth when you finally read this – to drop $2,000 and build a dedicated “AI PC”. I didn’t know much about what I was doing, and it can be hard to get definitive answers. So I used Copilot – which, yes, hallucinates more often than a 1960s hipster – to come up with a spec:

  • AMD 7800X3D, which a huge 96 MB cache
  • NVIDIA RTX 5070Ti, 16 GB of VRAM, based on my thinking NVIDIA was the way to go
  • …installed on a board with 32 GB DDR5, a few terabytes of storage, other things mainboards come with

Spoiler alert – I returned the 5070Ti. Now that the week has passed, the high level lessons, and questions I still have, are:

  • Model size matters. Even models that appear “small” or “look like they’ll fit”, don’t, or fail to load.
  • You don’t need large models to do your work. GPT-OSS and Gemma work incredibly fast, if the host parser doesn’t die.
  • Windows is not taken seriously as a hosting environment.
  • HuggingFace is a cool site, geared towards technical people, and does not hold your hand much.
  • You don’t need insane speed. You need reasonable speed that gets your job done “quickly enough.”
  • Next time, try an AMD Ryzen AI Processor, which supports unified memory, and 64 GB
  • Why does everyone want to use Python?

How I Code

Now, a bit about me. There are many developers using LLMs out there, and they range from “simple prompting” to “use agents and loops for everything.” I’m not an agents guy. I enjoy prompting, reviewing the results, confirming things look good, testing, and then checking in the code when it’s ready. I’ve been lambasted for that, like it’s “not fast enough.” To each their own – you do you. I know I’m accountable for what I commit – they can’t fire the LLM – and I only have so much brain bandwidth. I don’t want to review the output of multiple agents each day. It’s too much context switching, and I know I’ll miss something. Maybe a younger brain thinks differently about these things, but I’m a bit of an “old salty dog” developer. I care about architecture and code quality. If I can get that reliably at speed, I’ll take it. But I won’t sacrifice reliability for speed.

Choosing the Host Software

My goal is local AI development using VS Code and GitHub Copilot, which supports OpenAI-compatible endpoints. So I built the rig and tried both vLLM and Ollama. Later on I learned more about LM Studio and Unsloth. I will try those in my next go-around.

I started with vLLM. It’s recommended for being significantly faster than Ollama, even though it’s not as turnkey. Later research showed Ollama has similar performance when only one user is involved, while vLLM shines for a multi-user AI server scenario.

vLLM was too much trouble on Windows. It’s probably fine on Linux. But I wanted this machine to replace my existing IIS hosting environment AND be my AI machine. I’m not switching to Linux for AI. That’s a religious war, I know. It’s already lost, though – I’m not switching. There is no vLLM for Windows, so I had to run it via Windows Subsystem for Linux (WSL), which has a GPU proxy. This has both performance and VRAM fragmentation overhead. Really, you want to be on Linux, like I said. You can see where this is going.

vLLM was easy to set up. Their site wasn’t too helpful, but the tutorials elsewhere were. The command to run a model was effectively copy & paste from HuggingFace. It would download the model and attempt to run it. The problem was I simply didn’t have the VRAM to load the models, and vLLM would unceremoniously fail. Even running the Docker versions wouldn’t solve the problem. Based on all the information provided, I should have plenty of room to run these models. Alas, I do not. Scratch vLLM.

So I switched to Ollama, a turnkey solution that runs on Windows, runs on top of llama.cpp, and is already somewhat optimized for running on PC hardware. It can even intelligently mix CPU and GPU as needed, though the performance suffers significantly if it does so.

The Test

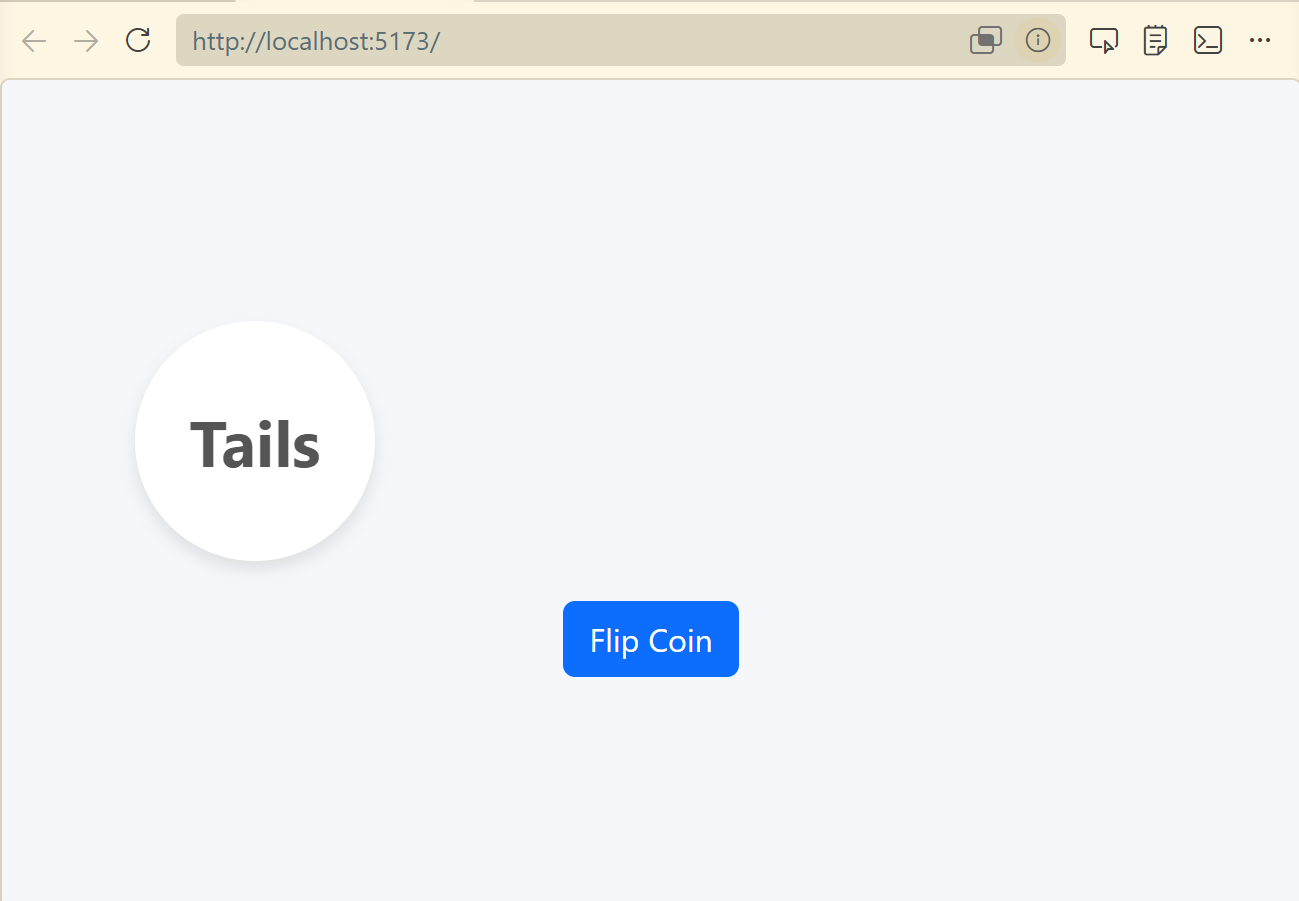
Now it’s time to choose the model and test which works best locally. My test is a simple prompt to generate a coin flipping website:

We need to create a basic React website with a single page for
flipping a coin to determine heads or tails. There should be a
single button, which triggers the coin flip. Create a coin flip
animation with the coin flipping "in the air" and then show either
"Heads" or "Tails". This should be random. Use bootstrap and be
mobile responsive. Use a calm design motif. Ask me any questions
and clarify any assumptions. Perform an adversarial review when
you complete.

I tried the following models:

  • Gemma 4 – Google-provided model based on Gemini
  • Gwen 3.5 – Open source model
  • GPT-OSS – OpenAI model based on GPT, 4B quantization

Gemma 4 was insanely fast. I was super excited, because code was being churned out quickly, and things felt similar to cloud services. And then I hit a snag. I was monitoring the GPU usage on the AI server while writing code on my laptop. VS Code just hung there, waiting for a response. The AI Server appeared to be “doing something” but nothing was happening. And this is where the turnkey solution of Ollama seems to break down.

You see, Ollama’s dev team decided to build their own “parsers” for each model. Rather than using the one that’s built-in to the llama.cpp runtime it’s based on, they go their own way. The problem here is, well, bugs. And there’s a reason Ollama isn’t at v1.0 – it’s still in progress. It’s still incredible for what it does, but it’s buggy. It’s free, too, so you’re at the mercy of the priorities of their dev team, which may want you to use their cloud service more than local inference.

The problem ended up being a “`” character Ollama simply couldn’t parse. A few Ollama updates came out over the course of the week, and none of them fixed the problem. So, I had to finish the coin flip with a different model. Bummer – Gemma was so promising. If vLLM would run it properly, I’d probably not have returned the GPU.

I did finally get Gemma over the hump by letting Sonnet finish the CSS and then continuing with Ollama. That’s a real benefit with the local LLM setup. Let the cloud services handle the “hard work” with some token usage. Then switch to your local model for most of the grunt work, effectively for free. It’s a significant value proposition, if you can get it to work.

Gemma finished the rest of the work. Here we go:

Gwen 3.5 was too slow. I gave up waiting for responses. Not enough VRAM, and CPU offloading was simply unusable.

GPT-OSS was my next go-to. It didn’t bomb on me like Gemma, and you can see its results below. It was fast enough to get work done. And that’s what we’re really looking for here – a model that works, with more expensive cloud-based models when we need the additional horsepower. I was surprised to still see it offload to the CPU, at least according to Ollama’s “ollama ps” command. Still, it performed quite well and didn’t get stuck, unlike Gemma. Sure, it wasn’t as fast as Gemma, but if you take all the process restarts into account, it was a much better, streamlined experience. Given this result, I was tempted to keep my current configuration. But seriously, one model working well? I’d be fooling myself.

Moving Forward – I’m Not Giving Up!

So I wanted to run an LLM with a relatively inexpensive card, and failed. It appears the minimum you need is 24 to 32 GB for the model, then processing time. Was this experiment a failure? Not really. It’s motivating me to try other approaches, which I’ll do and report back on.

I’m thinking the unified memory approach is much more appropriate, even if the speed isn’t on par with dedicated hardware. Solutions such as AMDs AI platform, which is similar to Apple’s Mx unified memory approach. And Apple’s Mx processors, and again unified memory. Ollama recently announced acceleration for Apple’s Machine Learning Framework on their M series processors. I’ll be getting results from those experiments over the next month.

Next up for testing:

  • Mac Studio with M4 Ultra and 96 GB RAM , on MacOS
  • AMD AI MAX+ 395 with 64 GB RAM, on Windows 11 and maybe Linux

For now I’m returning the 5070Ti. It’ll feel good getting $1K back.

Looking forward to giving you more updates soon!

Developer Rant Video

I also talked about this on my Developer Rant series if you’d like to watch:

Liq, my free bourbon + whiskey + tequila + mezcal + other spirit collecting and tasting app, was recently featured on the way cool Final Third Cigar Lounge Podcast. We discuss Liq, Final Third’s recent Jack Daniels Single Barrel Rye pick, and experiment with how the barrel location during aging affects its taste.

Enjoy the video (below) or the Podcast! And check Liq out at https://liq.live.

I had the opportunity to present Intro to Blazor at the Indy .NET Consortium last night. Here’s the video and presentation link for your enjoyment 🙂

Direct Link: https://www.youtube.com/watch?v=4r6h7cYdzRM

Presentation Link: https://we.tl/t-EnCpKYx8sa

While in Nashville, having just torched my insides with a fiery hot chicken sandwich from Prince’s, I passed by the all-glass enclosed Apple store on the corner of 5th & Broadway. It was about 6pm, and observations would indicate the evening had already started in the morning for most people. It was my last night in town and the Apple store got me thinking about the Vision Pro, my Quest 3, the 250,000 units Apple had sold to date, and of the articles claiming you could get a demo. So I walked in and asked “Can I get a demo of the Vision Pro?” “Sure! We may have an appointment left,” the friendly associate exclaimed. 7pm was available. I handed them my deets, and went off to drop some shopping goodies off at my hotel a few blocks away.

The Pre-Demo Setup

Before I even left the store, Apple had texted me a pre-demo survey. It was primarily concerned with whether I wore glasses (I do now), and whether I used them for near or far sightedness, or both. I answered the questions and Apple told me I was all set.

Apple’s pre-demo survey recommended I use the Zeiss inserts.

I strolled back into the store close to 7pm. They greeted me quickly with “You’re back!” Well, “I’m a man of my word” I exhorted, and followed them to the back of the store for the demo. Sam would be talking me through the demo. But first they needed my glasses so they could measure them with a fancy, expensive looking measurement machine. I think I’ve seen the same device at Warby Parker. They needed this to set up the Vision Pro for my exact prescription. This begged the question, “So what if my prescription changes? Do I need a new set of inserts?” “Yes, you would need to order new inserts” she explained. I didn’t see her add any inserts, so I was a bit confused by this, but why die on that hill? My guess is the Vision Pro adjusts by itself once provided the script details, but who knows. I sure hope I wouldn’t need to buy new adapters, err “inserts,” after already spending thousands of dollars on this thing. And of course – at this time – you can only buy Apple’s special Zeiss inserts, which I’m sure are a pretty penny.

The lens scanning machine.

After my eyes were ready, I also had to use an iPhone to scan my face. This process wasn’t working well until I moved to the solid-colored wall. The app just kept missing the scan. Sam was a bit frustrated as well, but she kept her cool.

Now, keep in mind, I’ve owned a Meta Quest 3 for a few months now. I was 100% comparing the setup process of that under $500 device to the setup process of a $3,500 (base!!) device here. With the Quest, I just put the unit on my head after some simple setup, and just kept my glasses on. I’m curious how much of this pomp and circumstance is actually necessary, or might be removed in a future software update for the Vision Pro.

Seeing all the work and equipment that went into just getting the unit to be “ready for me” helped me understand the price point. The optical equipment, the personnel, the technology for such a customized experience, has to come from somewhere. Given Apple would have raked in around $1.125B after selling 250K units, I hope they’ve recouped their costs. Now if only there were an iFixit teardown… Oh wait, there is!😀

Note that the entire demo was done while in a sitting position. I was sitting on a chair next to a wooden table. One other person was experiencing a demo at the same time.

Fit and Finish

Sam showed me what the buttons do – a button for the see-through mode, and a “digital crown” like the Apple watch. She also showed me the exact way to place the Vision Pro on my head. Thumb under the nosepiece, and four fingers on the top. Don’t touch the front! I asked what would happen if I did – would it just look ugly? She said yeah, it wouldn’t look good, but otherwise probably nothing. I followed her advice and put the unit on my head. I used the right-hand dial to tighen the unit as close as possible to my liking. Note that, because of the Zeiss inserts, I did not need my glasses on for the demo.

The “eyes” passthrough wasn’t part of the demo.

Once the Vision Pro was on my noggin’ I realized how heavy it is. I have a Quest 3 at home. This unit clearly felt heavier. It wasn’t uncomfortable, but it did feel like I had a decent size computer on my head, which of course I did. Sam suggested I move the strap around a bit. After somem finagling, I figured this was as good as it was going to get. It didn’t feel like it was going to fall off. It just felt front-heavy, like the top-heavy feeling I get when my bourbon-belly body is on rollerblades. I did a search, and the Quest 3 is around 515 grams, while the Vision Pro is around 532.

Moving my fingers around I also found the digital crown to be too small. I would use this control device later, and I have to tell you, it needs to be bigger. When you can’t see something, and you want to do small movements with it, and it’s already small, it’s frustrating. Yes, it’s cool, and it fits with the Apple ecosystem, but this needed to be adjusted.

The Digital Crown.

Now, the quality of the materials is top-notch. The strap was incredibly comfortable and disappeared as I used the product. Everything looks clean and precisely engineered. Even the carrying case looks like a high-end The North Face affair. The heaviness did not disappear, however.

The Demo

I should have mentioned earlier that Sam explained she could see everything I was seeing. She had an iPad wirelessly streaming the feed from the Vision Pro. She also had an iPhone that appeared to have the demo script. It was clear Apple wants this demo staged and not free-form. When I would pinch and zoom or move a window before being prompted, Sam would gently verbally nudge me with “Please wait for me.” Sorry, Sam!

First things first was the setup mode. The Vision Pro walked me through mapping my touching and vision. The vision part was interesting – I had to look at each dot on the screen and then pinch my fingers together to “tap” it. Moving my eyes, not necessarily my head, would move an invisible pointer. At the center of my vision – what I’m looking at – becomes what’s selected. It was also incredibly clear and vibrant – so whatever the Zeiss and vision calibration did, it did it well.

The experience is also fascinating from a UI and UX perspective. The center stays focused while items in my “peripheral” vision go out of focus when I move my head, coming into slightly better focus when I stop. In practice, this worked very well. However, the selecting and tapping part was not 100%. I’d say 3 out of 10 times – 30% – when I tried tapping something, the Vision Pro wouldn’t register the tap. Perhaps my hand was under the demo table and I didn’t realize it – but moving my hand closer to the device or further in front of me seemed to solve the issue. I also had to ensure I didn’t lose focus on what I wanted to tap, or I would “miss” or tap the wrong item. After some time using this, I’m sure it would become natural. For the most part it was – but it was clear after 30 minutes Apple has some tweaking to do in its UX, and I can see why this is a scripted demo. But still, damn, it’s amazing.

Once setup was complete, the Apple logo appeared, and I was greeted with the Home Screen. Yes, it looks like the typical iOS home screen layout, just in front of you with your surroundings in semi-transparent fashion in the background. You can tune out your surroundings by rotating the digital crown. I was only allowed to use on of the virtual backgrounds. Sam wouldn’t let me play with others, and she could clearly see via her iPad if I broke the rules. What I did experience, though, was a calming lakeside landscape. It even started raining while I was “there” and that was quite cool, and would have been calming had I not been in the middle of an Apple store. The speakers were loud enough for me to hear the raindrops, but I wasn’t there for that experience. Before you ask – no, I didn’t get a chance to set up the see-through mode that shows my eyes. That’s not part of the demo.

There are three basic gestures on the Vision Pro: Tap, Tap and Drag, and Pinch/Pull to Zoom. The first two are single-hand gestures performed with your dominant hand. The latter requires both hands, and gives you the feeling you’re in [insert Sci-Fi movie here] and manipulating virtual screens in the clear space in front of you. Yeah, it’s pretty cool. Another verbal wrist slap from Sam for me getting ahead of the game.

Demo 1 – Photos

The first demo was launching the classic Apple Photos app. There were many to choose from. Some were “flat” while others had the 3D depth old 3D Android phones were capable of many years ago. Remember the HTC Evo 3D? The flat photo was, well, a photo, and I could zoom in and out as expected. It was perfectly clear, and the colors were sharp and realistic. The 3D photo had true depth, and was shot on an iPhone 15 Pro. Both the 15 Pro and Pro Max support creating 3D and immersive content for the Vision Pro. Apple’s pushing those devices as content creation catalysts, understandbly. Because it was a scripted store demo, I didn’t ask for additional details like format support and technical details. My understanding is other 3D formats are supported, so you’re not limited to just Apple ecosystem solutions.

Demo 2 – Videos

Now for the fun part – video. There was no demo of a flat video here, and that’s fine. Who cares? Every headset does it. You’re not spending $3,500+ for a simple movie theater. There were two demos – one 3D video that wasn’t immersive, meaning it didn’t surround you, and another immersive sports video. The 3D video was cool – a family blowing out the candles on a cake. The frame rate seemed low, maybe 30fps, and reminded me of 3D video from those old 3D Android phones I talked about. It was neat that it was “large” in front of me, but it wasn’t mind-blowing due to having seen it before. Now, I’d like to know if the Quest 3 can do the same. Sam did not appreciate that I played the video more than once. To be fair, she had a lot of patience with me – thank you Sam!

The real treat was the immersive video compilation. It had many immersive videos, all being narrated by someone telling me how great “living the action” is. One was shot with a 360 degree (I think) camera placed on a soccer goal and I could see the game and the ball being kicked into the net. Another was a mountain landscape and I was watching the climber. Another was shot behind first base during a double play. You get the point – incredible action sequences to make you feel like you are there. And it did. It was exhilarating. I recall Sam explaining it was all 8K video. I asked if the screens themselves were 8K, but she wasn’t sure. The detail was phenomenal. Absolutely stunning.

Is there a new market here?

My first thought was Apple TV Plus – what if they started offering this type of content? Is that where it’s headed? I don’t know if it’s viable. Many of you may remember the many, many, MANY failures of trying to bring 3D into the home. Projectors, TVs, special glasses – and the fact 30% of human beings can’t watch 3D content without getting nauseous – it never worked. But they also didn’t have the content, other than more expensive 3D versions of Blu-ray discs. Could Apple stream this type of content? Could they convince people to wear these headsets while watching events such as concerts? I’m not convinced about sports, as I can’t see a bunch of people wearing headsets and drinking beer… Now that I’d like to see. If people generally look funny in VR, that would be a hoot. My point is, Apple certainly has the market position and technologies to make something happen here. What, I’m not yet sure… And Meta may be willing to play ball. If the monopoly regulators have their way, it may be a perfect match…

Demo 3 – Web Browsing and Compatible Apps

The last demo was showing that I could browse the web (Safari, yay?) and run “compatible apps” from the App Store. Meh. It’s iOS, so no surprises here. Cool, but no compelling killer app. The demo app Sam wanted me to run was a cooking app. I won’t be wearing a $3,500 + tax headset near the stove.

The Missing Demo

The Vision Pro content demos were impressive, to be sure. But where was the killer app to sell me on this $3,500 device? Sam kept telling me how this was a “Spatial Computing” device. But never did I see an example of spatial computing. I saw spatial consuming but not spatial creating. I would love to see the results of a survey of the 250,000 purchasers of this product explaining why… and what their income bracket is.

Final Thoughts

I took the Vision Pro off my head and handed it back to Sam. I did this the proper way… thumb under the nosepiece and four fingers on top. I thanked her for the experience and agreed it was quite impressive. I asked how many of these they sold each day. She couldn’t say, other than some people come in and simply buy one outright, no demo needed. It wouldn’t have been fair to ask her why – she’s just selling the unit, and knows fervent Apple fans with an Apple Credit Card are often willing to buy more Apple products (I jest).

But after the demo, I had no incentive to purchase the unit. There was nothing about it, at least during this entertaining 30 minute demo, that left a compelling reason on the table. Certainly not one that made me go “Gosh, I wish my Quest 3 did that!” I do need to determine if the Quest 3, at 1/6 the price, can do 3D video (UPDATE: It does!). But the Vision Pro demo was all about content consumption, and the Quest 3 does effectively the same thing in spades. Oh, and I can play VR games made specifically for its platform (noticeably absent from the Apple demo, but also understandable given the time constraints).

I also left with the feeling of possibility. What the Vision Pro represents, and what could come from such technology, finally, in the content consumption space. And maybe, eventually, in the content creation space, if Apple’s professional applications arm releases whatever they’ve got cooking. Who cares what you call it – spatial computing, VR, or otherwise – if you build something truly compelling.

Either way, the demo was worth it, I got my technologist buzz and my analyst gears working, and still have $3,500 to spend on something else.

I log a lot of event data in Microsoft AppCenter. Thousands of events per day. Unfortunately, AppCenter has a hard limit of 200 distinct custom events for their event data. So, when you look at that great event filter they have, you’re not actually seeing all the data. HOWEVER, that does NOT mean AppCenter is limited to a scant 200 events. Hardly. Behind the scenes, AppCenter is powered by Application Insights. As long as you have storage available, you can keep all your events in App Insights. The problems I ran into were:

  1. I didn’t know Kusto, or KQL, the query language used by App Insights, and
  2. It’s not obvious how to access all the metadata I log for each event.

What’s metadata, you may ask? Well, it’s the additional data you log alongside an event. In AppCenter, the term for metadata is Properties, but I digress. For example, if you’re logging an Software Update Success or Failure, you may also include metadata about a product ID, model number, firmware version, and so forth. Finding the event data is easy. Finding and reporting on the metadata is not so straightforward.

So, dear reader, I have an example query for you. You can copy & paste this into your App Insights query editor and be good to go.

So here’s the query I used to extract a summary of how many software updates succeeded, for specific model numbers, with a count by model number:

customEvents
| where name in ("Software Update: Succeeded")
| extend jsonData = tostring(parse_json(tostring(customDimensions.Properties)).['Model Number'])
| where jsonData in ("model1", "model2", "model3", "model4")
| summarize count() by jsonData

So what’s happening here? Let me explain:

customEvents

This is the table App Insights stores all events sent by AppCenter.
| where name in ("Software Update Succeeded")

This filters those events by the event name.
| extend jsonData = tostring(parse_json(tostring(customDimensions.Properties)).['Model Number'])

This converts the metadata field – aka customDimensions.Properties – from JSON, extracts a particular metadata field – in this case, Model Number – and then returns that metadata value as a string.
| where jsonData in ("model1", "model2", "model3", "model4")

This is a simple filter query. I found if I wanted to get all model numbers I could simply use the following, though your mileage may vary:

| where jsonData !in ("")

And then finally:
| summarize count() by jsonData

This takes the results, by model number, and summarizes with counts. App Insights will even automatically generate a graph for you!

Refining the query above, and as you use more extend keywords to extract more data, you may want to use a more meaningful variable name than jsonData 😁 For example, here’s a more robust query I wrote, identifying the unique counts by total number of users performing the action:

customEvents
| where name in ("Software Update: Succeeded")
| where timestamp > ago(30d)
| extend modelNumber = tostring(parse_json(tostring(customDimensions.Properties)).['Model Number'])
| extend modelName = case(
modelNumber == "model1", "Headphones",
modelNumber == "model2", "Soundbars",
modelNumber == "model3", "Powered Speakers",
"n/a")
| where modelNumber !in ("")
| summarize count() by user_Id, modelName
| summarize count() by modelName

The two summarize filters let me break things down by total number of users with total number of product models. Here you can see how I used proper variable names and used the other useful customEvents data. This also helps me get data similar to the cool, useful graphs AppCenter shows on their dashboard.

You can do a lot more with this data, but it should get you started. I hope it helps you as it did me.

Additional tip:

Application Insights only stores data for 30 days by default. If you want to retain and report on your events beyond that timeframe, make sure you update your App Insights instance settings.

Tour of the Western Wall 1
Tour of the Western Wall 2
Wailing Wall 1
Wailing Wall 2
Dead Sea Scrolls Monument
The Dead Sea
Praying on the Flight to Israel
Goat at the Nazareth Village Living Museum